How to Record Vocals at Home: The Complete Beginner's Guide
What Every Beginner Needs to Know Before Recording Vocals at Home
"I want to record my vocals at home, but I have no idea where to start" — this is the number one question beginners ask. By the end of this guide, you'll know exactly which gear to buy, how to connect everything, which recording software to use, and how to get the best possible sound. The short answer: with a budget of $40–$120 and free software, you can start recording seriously today.
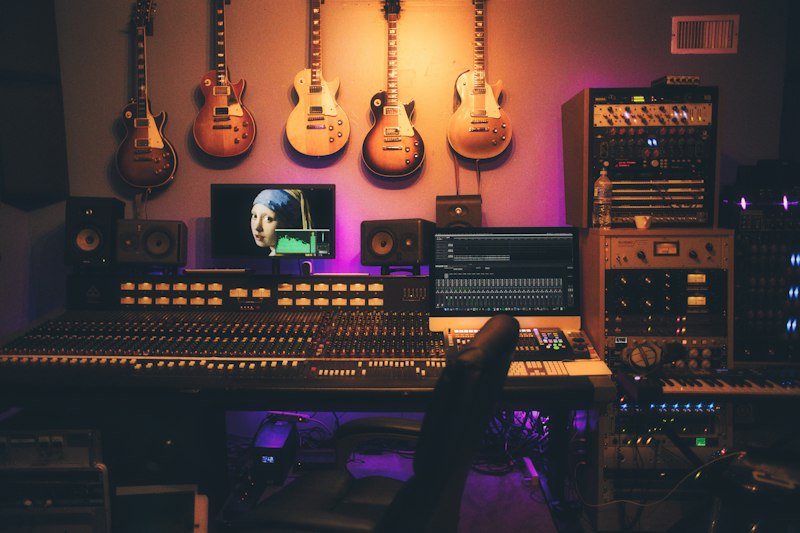
Essential Gear for Home Vocal Recording (Minimum Setup)
Let's break everything down into "must-haves" and "nice-to-haves" so you don't waste money on things you don't need yet. Start with the minimum setup and build from there.
① Condenser Microphone (Budget: $25–$100)
The most popular choice for vocal recording is a condenser microphone. Condensers are highly sensitive and capture subtle nuances in your voice. Here are some great options for beginners:
- Audio-Technica AT2020 (~$99): A long-time industry standard used in professional studios. Low noise floor and very forgiving for beginners.
- Marantz MPM-1000 (~$30): Outstanding value for the price. A great first mic if you're on a tight budget.
- Blue Yeti (by Blue Microphones) (~$130): USB-powered, so no audio interface needed. Plug straight into your computer and go.
If budget is a concern, a USB microphone eliminates the need for an audio interface entirely, significantly cutting your startup costs.
② Audio Interface (Budget: $40–$150)
If your mic uses an XLR connector, you'll need an audio interface — think of it as the translator between your microphone and your computer. Popular beginner options include:
- Focusrite Scarlett Solo (4th Gen) (~$120): The world's best-selling audio interface. Rock-solid drivers and minimal setup headaches for beginners.
- Behringer UM2 (~$40): The most affordable entry point. Prioritizes convenience over audio quality.
- MOTU M2 (~$170): A step up in audio quality with loopback functionality — great if you also want to stream.
③ Pop Filter and Mic Stand (Budget: $10–$20)
A pop filter sits in front of your microphone and eliminates the harsh "plosive" sounds produced by letters like P and B. It's a small purchase that makes a huge difference in recording quality. A simple desk clamp mic stand (~$10) is all you need to get started.
④ Headphones (Budget: $25–$100)
Always use closed-back headphones when recording. If you monitor through speakers, the sound will bleed into your microphone and cause feedback. The Audio-Technica ATH-M50x (~$150) is a classic choice, and the Sony MDR-7506 (~$100) is another popular option in studios worldwide.
Setting Up Your Recording Space: Taming the Room
Professionals will tell you that your recording environment has a bigger impact on sound quality than your gear. Spending all your budget on equipment while ignoring the room is one of the most common beginner mistakes.
Reducing Reverb and Room Reflections
Hard floors and high ceilings cause sound to bounce around, giving your recordings an unpleasant "bathroom" quality. Here's how to fix that:
- Record in a closet: Hanging clothes act as natural sound absorbers. Recording inside a walk-in closet is the easiest, cheapest acoustic treatment you can do.
- Use acoustic foam panels: Foam panels are available for as little as $1–2 each on Amazon. Place them behind and to the sides of your mic for noticeable improvement.
- Lay down a rug: Covering a hard floor reduces floor reflections and gives your vocal recordings a cleaner, more defined sound.
Dealing with Background Noise
Air conditioning, street traffic, a noisy keyboard — condenser mics pick up all of it. The basics: turn off your AC, close the windows, and if possible, record late at night when ambient noise is lowest. If noise still makes it into your recordings, you can remove it in post-production using a noise reduction tool (more on that below).
Choosing Your Recording Software (DAW)
A DAW (Digital Audio Workstation) is the software you use to record, edit, and mix your audio. Here's a breakdown of the most popular options so you can find the right fit.
DAW Comparison at a Glance
- GarageBand (Mac/iPad, free): The default choice for Apple users. Intuitive interface with a very gentle learning curve.
- Audacity (Windows/Mac/Linux, free): A long-standing free tool focused on recording and editing. Mixing capabilities are limited, but it gets the job done.
- Cakewalk by BandLab (Windows, free): A formerly paid professional DAW, now completely free. Full-featured project management included.
- Studio One Prime (Windows/Mac, free): A polished interface with a clear upgrade path if you want to go pro later.
- LA Studio (Browser, free): No download or account required — record directly in your browser. Powered by WebGPU for near-native app performance.
The Fastest Way to Start: Browser-Based DAWs
If you want to skip the whole "download, install, configure" process, a browser DAW is your fastest path to recording. LA Studio runs entirely in Chrome or Edge — multitrack recording, editing, and effects processing, all without installing a single file. It works on Chromebooks, MacBooks, and Windows PCs alike.
Step-by-Step: How to Record Vocals at Home
Here's the complete recording process broken down into eight steps. These instructions assume you're using either a USB microphone or an XLR microphone connected via an audio interface.
Step 1: Connect Your Gear
- Connect your microphone to the XLR input on your audio interface. If you're using a condenser mic, enable phantom power (the "+48V" button).
- Connect the audio interface to your computer via USB.
- Plug your headphones into the headphone output on the interface.
Step 2: Configure Your Audio Device
- Go to your computer's sound settings (Windows: Sound Settings; Mac: System Settings → Sound) and set your input device to the audio interface.
- Open your DAW, go to audio settings, and select the interface as your input/output device. (In LA Studio, go to the LA menu in the top bar → Audio Settings.)
Step 3: Set Your Recording Level
Adjust the gain knob on your interface while singing at your loudest. Aim to keep your input level between -12 dBFS and -6 dBFS. If the clip indicator lights up red, your signal is peaking and distorting — lower the gain until it stops.
Step 4: Create a Recording Track
- Create a new project in your DAW.
- Add an audio track.
- Set the input source to your microphone or audio interface.
- Enable the record arm button (usually a red "R" button) on the track.
Step 5: Set Up a Count-In and Metronome
If you're recording over a backing track, import the audio file into your DAW and place it on a separate track. Turn on the metronome (click track) and set the correct tempo — this makes editing much easier later.
Step 6: Record
Hit record and start singing. Don't try to nail it in one take. Even in professional studios, singers routinely record 10–30 takes of the same phrase. Record as many takes as you need, then use punch-in recording to fix specific problem spots.
Step 7: Edit and Pitch Correct
After recording, trim any silent gaps, smooth out volume inconsistencies with a compressor, and correct any pitch issues with Auto-Tune. LA Studio's Auto-Tune tool uses AI to automatically detect every note in your vocal performance and displays them on a piano roll, where you can drag notes into place with cent-level precision — a free, browser-based alternative to Melodyne.
Step 8: Mix and Export
Polish your vocal with EQ, reverb, and delay, then export as WAV or MP3. If you're uploading to streaming platforms or social media, aim to normalize your loudness to around -14 LUFS — most DAWs include a built-in loudness meter for this.
5 Tips for Better-Sounding Vocal Recordings
Tip 1: Stay 6–10 Inches from the Mic
Getting too close causes the "proximity effect" — an exaggerated bass boost that makes your voice sound muddy. Too far away, and you'll pick up too much room sound. A distance of 6–10 inches is a solid starting point; adjust based on your vocal volume.
Tip 2: Sing at a Slight Angle to the Mic
Singing directly into the capsule increases plosive sounds. Simply angling yourself 5–10 degrees off-axis dramatically reduces this problem. Combined with a pop filter, your plosive issues should disappear entirely.
Tip 3: Record More Takes Than You Think You Need
Never delete a take on the spot. A performance you think is bad often sounds great when you come back to it later. Comping — stitching together the best moments from multiple takes — is a standard production technique used on virtually every major recording.
Tip 4: Remove Noise After the Fact
If background noise makes it into your recording, use an AI noise removal tool. LA Studio's noise removal feature lets you upload any audio file and automatically strips out white noise, hum, and ambient room sound with a single click.
Tip 5: Go Easy on the Reverb
Over-reverbing is the most common beginner mixing mistake. Start with a short reverb (decay time under 1.5 seconds) and dial it back further than feels natural. The saying in mixing is: "if you can clearly hear the reverb, there's too much of it."
Start Recording in Your Browser — No Install Required
If downloading and configuring software sounds like a hassle, a browser-based DAW is the fastest route to your first recording. The workflow below can have you recording within five minutes of reading this, even on a brand-new computer.
- Open Chrome or Edge.
- Go to LA Studio Editor (no account needed).
- Click the LA menu → Audio Settings → select your microphone.
- Click the "+" button to add an audio track, then enable the record arm button.
- Hit record and sing.
- Apply the built-in EQ, compression, and reverb, then export as WAV.
Tools like Audacity, GarageBand, and Cakewalk are feature-rich, but they all require installation and initial setup. If you just want to experience recording for the first time, a browser DAW is the most frictionless way to start.
Frequently Asked Questions
Q: Can I record with the mic on my earbuds?
A: Technically, yes — but the quality will be noticeably worse. Earbud microphones are designed for phone calls, not music recording. They have a narrow frequency response and lose a lot of high-end detail. Even a $20 USB microphone will be a massive step up, so any investment here is worth it.
Q: Should beginners use a condenser mic or a dynamic mic?
A: If you can record in a quiet room, go with a condenser microphone — it's more sensitive and captures more vocal detail. If your room has a lot of reverb or background noise, a dynamic microphone (like the Shure SM58) is more forgiving and easier to work with in less-than-ideal spaces. Choose based on your environment.
Q: When do I need to turn on phantom power (+48V)?
A: Always enable phantom power when using an XLR condenser microphone — it won't work without it. Dynamic mics and USB mics don't need phantom power. Phantom power won't damage a dynamic mic if you accidentally leave it on, but a condenser mic simply won't function without it.
Q: My recordings have a lot of noise. What's causing it?
A: The four most common causes are: ① too much gain on the interface causing internal noise; ② environmental sounds like AC units or fans; ③ your computer's cooling fan; ④ a faulty or loose cable connection. Start by turning off the AC and lowering your gain. If that doesn't fix it, run the recording through an AI noise removal tool as a post-processing step.
Q: Can I pitch-correct my vocals without installing a DAW?
A: Yes. LA Studio's Auto-Tune feature is completely free, browser-based, and requires no account. Upload your audio file, and the AI automatically detects every sung note and displays them on a piano roll. Drag to correct pitch, or use the one-click key/scale correction for instant results — unlimited and free.
Summary: Your Home Recording Checklist
Here's everything you need to start recording vocals at home:
- ✅ Get a USB mic, or an XLR mic + audio interface
- ✅ Add a pop filter and a pair of closed-back headphones
- ✅ Reduce room reverb by recording in a closet or using acoustic foam
- ✅ Choose your DAW — for zero setup, start with a browser DAW
- ✅ Set your input level to -12 to -6 dBFS before pressing record
- ✅ Record multiple takes → comp the best parts → pitch correct → mix and export
A minimum starter setup will run you roughly $60–$160 (USB mic ~$30 + pop filter ~$10 + headphones ~$25+). Recording software is available for free. If you just want to dive in and try recording right now, head over to LA Studio and start recording in your browser — no download, no account, no waiting.